If you’re from Detroit, or if you’ve ever had the pleasure of tasting it, you know there’s something truly special about a Bumpy Cake.
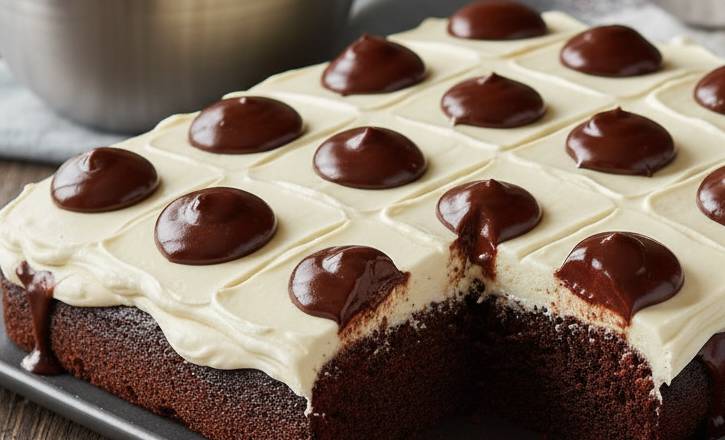
This iconic dessert, originating from Sanders Confectionery, is a celebration of textures and flavors: a rich chocolate fudge cake, topped with signature “bumps” of vanilla buttercream, all enveloped in a generous layer of glossy chocolate ganache. It’s a nostalgic favorite and a true comfort classic.
While the original is legendary, recreating this decadent treat at home is not only possible but incredibly rewarding. Our recipe aims to capture the essence of that beloved Bumpy Cake, ensuring every bite delivers that perfect combination of moist cake, creamy vanilla, and deep chocolate. Get ready to bake a masterpiece that will have everyone asking for seconds!
What You’ll Need: Ingredients and Equipment
Careful measurement and quality ingredients are key to a successful Bumpy Cake.
For the Chocolate Fudge Cake:
- 1 ¾ cups all-purpose flour
- ¾ cup unsweetened cocoa powder
- 2 cups granulated sugar
- 1 ½ teaspoons baking soda
- 1 teaspoon baking powder
- 1 teaspoon salt
- 1 cup buttermilk, at room temperature
- ½ cup vegetable oil
- 2 large eggs, at room temperature
- 1 teaspoon vanilla extract
- 1 cup hot water (or hot coffee for deeper flavor)
For the Vanilla Buttercream Bumps:
- 1 cup (2 sticks) unsalted butter, softened
- 3-4 cups powdered sugar, sifted
- ¼ cup heavy cream (or milk)
- 1 ½ teaspoons vanilla extract
- Pinch of salt
For the Chocolate Ganache Glaze:
- 1 cup semi-sweet chocolate chips (good quality for best flavor)
- ½ cup heavy cream
- 1 tablespoon unsalted butter (for shine, optional)
Equipment:
- 9×13 inch baking pan
- Electric mixer (stand mixer recommended)
- Saucepans
- Whisks and spatulas
- Piping bag with a round tip (or a zip-top bag with a corner snipped off)
Step-by-Step Guide: Crafting Your Best Bumpy Cake
Step 1: Bake the Chocolate Fudge Cake
- Preheat Oven & Prep Pan: Preheat your oven to 350°F (175°C). Grease and flour a 9×13 inch baking pan, or line it with parchment paper leaving an overhang on the sides for easy lifting.
- Combine Dry Ingredients: In a large bowl, whisk together the flour, cocoa powder, granulated sugar, baking soda, baking powder, and salt.
- Add Wet Ingredients (except hot water): Add the buttermilk, vegetable oil, eggs, and vanilla extract to the dry ingredients. Beat with an electric mixer on medium speed for 2 minutes, until well combined and smooth.
- Add Hot Water: Carefully stir in the hot water (or hot coffee). The batter will be thin.
- Bake: Pour the batter into the prepared pan and bake for 30-35 minutes, or until a wooden skewer inserted into the center comes out with moist crumbs, not wet batter.
- Cool Completely: Let the cake cool in the pan on a wire rack for about 15-20 minutes, then invert it onto the wire rack to cool completely. This is crucial before adding the buttercream.
Step 2: Prepare the Vanilla Buttercream Bumps
- Cream Butter: In the bowl of an electric mixer, beat the softened butter on medium speed until light and fluffy (about 2-3 minutes).
- Gradually Add Powdered Sugar: With the mixer on low, gradually add the sifted powdered sugar, one cup at a time, until mostly incorporated.
- Add Liquid & Flavor: Pour in the heavy cream, vanilla extract, and pinch of salt. Increase speed to medium-high and beat for another 3-5 minutes, until the buttercream is light, fluffy, and smooth. If it’s too thick, add more cream a teaspoon at a time; if too thin, add more powdered sugar.
- Pipe Bumps: Transfer the buttercream to a piping bag fitted with a round tip (or use a zip-top bag with a small corner snipped off). Pipe rows of “bumps” or dollops evenly across the top of the cooled chocolate cake. You’ll want about 6 rows lengthwise and 10-12 rows widthwise to create those iconic bumps.
- Chill: Place the cake in the refrigerator for at least 30 minutes (or freezer for 15 minutes) to firm up the buttercream bumps. This helps them hold their shape when the ganache is applied.
Step 3: Make the Chocolate Ganache Glaze
- Heat Cream: In a small saucepan, heat the heavy cream over medium heat until it just begins to simmer around the edges (do not boil).
- Melt Chocolate: Remove from heat and immediately pour the hot cream over the chocolate chips (and butter, if using) in a heatproof bowl. Let it sit for 5 minutes without stirring.
- Whisk Smooth: After 5 minutes, whisk gently from the center outwards until the ganache is completely smooth and glossy.
- Cool Slightly: Let the ganache cool at room temperature for about 10-15 minutes, stirring occasionally, until it’s slightly thickened but still pourable. This prevents it from running off the cake too quickly and ensures a good coating.
Step 4: Assemble & Glaze Your Bumpy Cake
- Pour Glaze: Retrieve the chilled cake with the firm buttercream bumps. Slowly and evenly pour the slightly cooled ganache over the entire surface of the cake, ensuring it covers all the bumps and drips attractively down the sides. You can use an offset spatula to gently nudge the glaze to the edges if needed.
- Set: Allow the ganache to set at room temperature for about 30-60 minutes, or refrigerate for 15-20 minutes for a quicker set.
- Serve: Once set, slice and serve this magnificent dessert!
Conclusion
Creating your own Bumpy Cake at home is a truly rewarding experience. This recipe delivers that perfect balance of a rich, moist chocolate cake, sweet and creamy vanilla bumps, and a luxurious chocolate ganache.
While it involves a few different components, each step is straightforward and worth the effort for the resulting show-stopping dessert. Whether you’re a long-time fan of the Detroit classic or discovering it for the first time, this Bumpy Cake is sure to become a cherished recipe in your baking repertoire.
Get ready for smiles and satisfied sighs with every delicious bite!
FAQ
Q: Can I use a different type of cake for the base?
A: While a moist chocolate fudge cake is traditional and highly recommended for its complementary flavor, you could technically experiment with other rich chocolate cake recipes. However, stick to a dense, sturdy cake that can support the buttercream bumps and ganache.
Q: My buttercream bumps aren’t holding their shape. What went wrong?
A:
- Butter too soft: Ensure your butter is softened but not melted. If it’s too warm, the buttercream will be too loose.
- Not enough powdered sugar: Powdered sugar gives buttercream its structure. Add more, a tablespoon at a time, until the desired consistency is reached.
- Not chilled enough: Chilling the piped bumps in the refrigerator or freezer is crucial. This firms them up so they don’t melt or flatten when the warm ganache is poured over them.
Q: My ganache is too thick/thin. How can I fix it?
A:
- Too thick: Add heavy cream, one teaspoon at a time, and whisk until it reaches a pourable consistency.
- Too thin: Add more chocolate chips (or finely chopped chocolate) to the warm ganache, let it sit for a few minutes, then whisk until smooth. If still too thin, let it cool at room temperature for a bit longer, stirring occasionally, to allow it to thicken naturally.
Q: How do I store leftover Bumpy Cake?
A: Bumpy Cake should be stored in an airtight container at room temperature for up to 2-3 days. For longer storage, it can be refrigerated for up to a week, but the cake might dry out slightly. Bring it to room temperature before serving for the best texture and flavor.
Q: Can I freeze Bumpy Cake?
A: Yes, Bumpy Cake freezes well. Wrap individual slices or the entire cake (once fully set) tightly in plastic wrap, then again in aluminum foil. It can be frozen for up to 1-2 months.
Thaw in the refrigerator overnight, then bring to room temperature before serving.