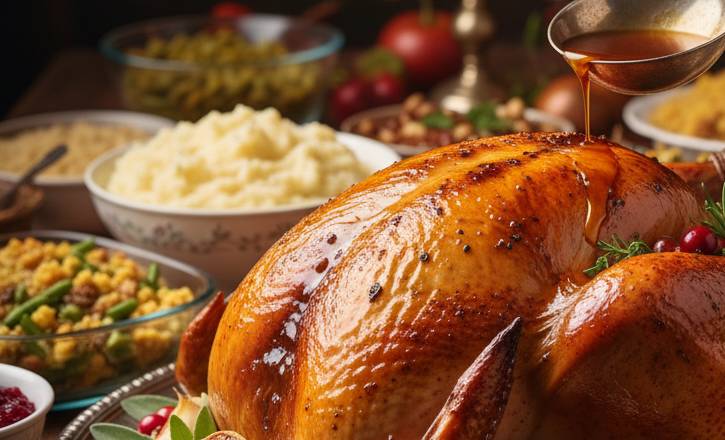
For many, the roast turkey is the undisputed centerpiece of holiday feasts—a symbol of gathering, abundance, and warmth. Yet, the thought of cooking a large turkey can often conjure images of dry meat, bland flavors, and kitchen stress.
But fear not! Achieving a perfectly juicy, flavorful, and golden-skinned bird is entirely within reach, even for the novice chef.
This comprehensive guide, “How to Cook the Best Roast Turkey,” will demystify the process. We’ll walk you through every critical step, from proper preparation to expert cooking techniques, ensuring your turkey is moist, tender, and infused with incredible flavor. Get ready to impress your family and friends with a holiday masterpiece that’s far from dry!
Ingredients: What You’ll Need
- 1 whole turkey (12-15 lbs), fresh or fully thawed
- 1/2 cup (1 stick) unsalted butter, softened
- 2 tablespoons fresh herbs, finely chopped (e.g., sage, thyme, rosemary)
- 1 tablespoon Kosher salt
- 1 teaspoon black pepper
- 1 large yellow onion, quartered
- 2 carrots, roughly chopped
- 2 celery stalks, roughly chopped
- 4 cups chicken or vegetable broth (plus more if needed for basting)
- Optional: 2-3 sprigs of fresh rosemary and thyme for the cavity
- Optional: 1 lemon, quartered, for the cavity
Method: How to Cook the Best Roast Turkey (Step-by-Step)
Step 1: Prep the Turkey (Crucial for Flavor & Moisture)
- Thaw (if frozen): If your turkey is frozen, allow ample time for thawing in the refrigerator—about 24 hours for every 4-5 pounds.
- Remove Giblets: Remove the neck and giblets from both the main cavity and the neck cavity. You can save these for gravy if desired.
- Pat Dry, Very Dry: This is a crucial step for crispy skin! Use paper towels to pat the entire turkey, inside and out, thoroughly dry. Moisture on the skin prevents browning and crisping.
- Seasoning Butter: In a small bowl, combine the softened butter with chopped fresh herbs, Kosher salt, and black pepper.
- Apply Butter: Gently loosen the skin over the breast and thighs (without tearing it) and rub about half of the herb butter mixture directly onto the meat under the skin. Rub the remaining butter over the entire exterior of the turkey.
- Stuff the Cavity (Aromatics, Not Stuffing): Place the quartered onion, carrots, celery, and optional lemon/herb sprigs inside the turkey cavity. Do NOT stuff the cavity tightly with bread stuffing, as this prevents even cooking and can be a food safety risk. Cook stuffing separately.
- Truss (Optional but Recommended): Tie the legs together with kitchen twine and tuck the wing tips under the body. This helps the turkey cook more evenly and maintain its shape.
Step 2: Roasting Day – The Heat is On!
- Preheat Oven: Preheat your oven to 425°F (220°C). Place an oven rack in the lowest position.
- Roasting Pan Setup: Place the turkey on a V-rack inside a large roasting pan. Pour 2 cups of chicken broth into the bottom of the pan.
- Initial Roast (High Heat): Place the turkey in the preheated oven. Roast at 425°F (220°C) for 30 minutes. This high heat helps to crisp the skin and kick-start the browning process.
- Reduce Heat & Continue Roasting: After 30 minutes, reduce the oven temperature to 325°F (160°C). Continue roasting.
- Basting (Optional): You can baste the turkey every 45-60 minutes with the pan juices, or with additional warmed broth. Basting helps keep the skin from drying out too quickly and contributes to a beautiful golden color.
- Tent if Browning Too Quickly: If the skin starts to get too dark before the turkey is cooked through, loosely tent it with aluminum foil.
Step 3: Check for Doneness & Rest (Crucial for Juiciness)
1.Monitor Temperature: Begin checking the turkey’s internal temperature after about 2-2.5 hours of total roasting time.
- Insert a meat thermometer into the thickest part of the thigh, avoiding the bone.
- The turkey is done when the temperature reaches 165°F (74°C) in the thigh. The juices should run clear.
- Approximate Roasting Times (at 325°F/160°C after initial high heat):
- 12-14 lbs: 2.5 – 3 hours
- 14-16 lbs: 3 – 3.5 hours (These are guidelines; always rely on the thermometer!)
2.Remove & Rest: Once the turkey reaches 165°F, immediately remove it from the oven. This is critical for a juicy turkey! Loosely tent it with aluminum foil and let it rest for at least 20-30 minutes (even up to an hour for larger birds) before carving. This allows the juices to redistribute throughout the meat, resulting in a much juicier turkey.
3.Make Gravy (Optional): While the turkey rests, you can use the pan drippings to make a delicious gravy.
Step 4: Carve & Serve
- Carve: After resting, carve the turkey. Start by removing the legs and thighs, then slice the breast meat.
- Serve: Arrange the carved turkey on a platter and serve immediately with your favorite side dishes and gravy.
Conclusion: Your Best Holiday Turkey Yet!
Cooking the best roast turkey might seem intimidating, but by following these simple yet crucial steps—from proper preparation and seasoning to precise roasting and, most importantly, adequate resting—you’ll achieve a truly spectacular bird.
This “How to Cook the Best Roast Turkey” guide promises a juicy, flavorful, and beautifully golden centerpiece that will be the highlight of your holiday table. Say goodbye to dry turkey and hello to perfection!
FAQ
Q1: My turkey always comes out dry. What’s the secret to keeping it juicy?
A: There are three main secrets to a juicy turkey:
- Pat it very dry: This helps the skin crisp, creating a barrier that locks in moisture.
- Don’t overcook it: Use a reliable meat thermometer and remove the turkey once it reaches 165°F (74°C) in the thickest part of the thigh.
- Rest it properly: Tent the cooked turkey loosely with foil and let it rest for at least 20-30 minutes (or longer for larger birds) before carving. This allows the juices to redistribute throughout the meat.
Q2: Should I brine my turkey?
A: Brining (soaking the turkey in a salt-water solution) is an excellent way to ensure a juicy and flavorful turkey. While this recipe focuses on a simpler butter-herb rub, brining definitely enhances moisture and seasoning. If you choose to brine, reduce the amount of salt in the butter rub, as the turkey will already be seasoned from the brine.
Q3: What’s the best way to thaw a frozen turkey?
A: The safest method is in the refrigerator. Allow approximately 24 hours for every 4-5 pounds of turkey. For example, a 15-pound turkey would need about 3-4 days to thaw completely. Do not thaw at room temperature.
Q4: Why shouldn’t I stuff the turkey cavity with bread stuffing?
A: Stuffing a raw turkey’s cavity can create a food safety risk. The stuffing inside the turkey cooks much slower than the bird itself. By the time the stuffing reaches a safe temperature (165°F/74°C), the turkey meat (especially the breast) is often severely overcooked and dry. It’s best to cook your stuffing in a separate dish. You can still use aromatics like onions, carrots, celery, and herbs in the cavity to infuse flavor into the turkey.
Q5: How do I get crispy skin?
A:
- Pat it very dry before applying seasoning.
- Rub butter (or oil) under and over the skin.
- Start with high heat: Roasting at 425°F (220°C) for the first 30 minutes helps the skin crisp up.
- Avoid basting too often once the skin has started to crisp, or use hot broth/juices when you do. If it starts getting too dark, tent it loosely with foil.
Q6: Can I prepare parts of the turkey the day before?
A: Yes! You can remove the giblets and neck, pat the turkey dry, apply the herb butter mixture, and place the aromatics in the cavity the day before. Cover it loosely and refrigerate. This even allows the flavors to meld more deeply! Just bring it out of the fridge about an hour before roasting to let it come closer to room temperature for more even cooking.