Sweetened condensed milk is a powerhouse ingredient in American baking, essential for everything from Key Lime Pie and fudge to the perfect glass of Vietnamese iced coffee. But what happens when you’re halfway through a recipe and realize you’re out of that crucial can?
Don’t panic and don’t rush to the grocery store! You can make a surprisingly good substitute right at home using just your microwave, a couple of pantry staples, and less time than it takes to preheat your oven. This quick-fix method is perfect for those unexpected baking emergencies.
Ingredients You’ll Need (The Two Key Players)
This recipe is incredibly straightforward and only requires two basic ingredients, plus an optional flavor boost:
- 1/2 cup Milk
- 1/3 cup Granulated Sugar
- 1 teaspoon Butter (Optional)
- 1/4 teaspoon Vanilla Extract (Optional)
Step-by-Step Instructions: The Microwave Method
Making condensed milk in the microwave is all about gradual heating and frequent stirring to evaporate the water and dissolve the sugar without scorching the milk.
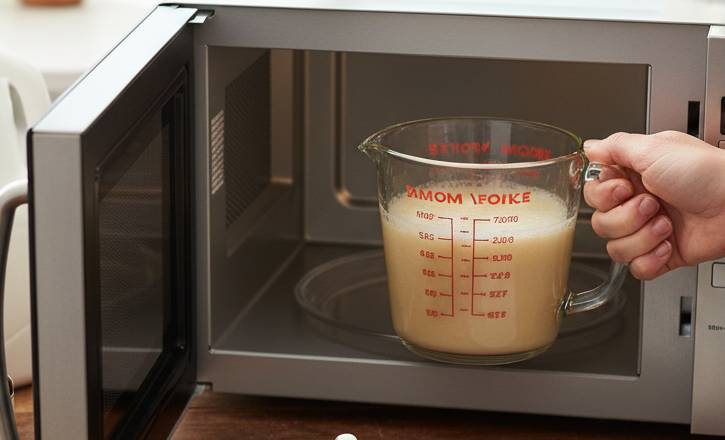
Step 1: Prep the Mixture
In an extra-large, microwave-safe bowl (a 4-cup measuring cup works great), combine the milk and granulated sugar. If using, add the butter and vanilla extract. Use a whisk to mix the ingredients thoroughly until the sugar is mostly dissolved.
Tip: Always use a larger bowl than you think you need! The milk will foam up significantly as it heats, and you want to prevent an overflow in your microwave. The larger bowl prevents a sticky mess!
Step 2: Heat and Whisk (The First Rounds)
Place the bowl in the microwave, uncovered. You’ll heat the mixture in short intervals at a reduced power setting to control the boil and prevent boil-overs.
- Microwave on 50-60% power for 2 minutes.
- Carefully remove the bowl (it will be hot!) and whisk vigorously for about 30 seconds.
- Repeat this process—microwave for 2 minutes and whisk for 30 seconds—two more times (for a total of 3 cycles).
Step 3: Heat and Thicken (The Final Push)
After the initial rounds, the milk should be very hot and frothy. Now, we’ll switch to shorter, more frequent intervals to concentrate the mixture.
- Microwave on 50-60% power for 1 minute.
- Whisk vigorously for 15-30 seconds.
- Repeat this 1-minute heat/whisk cycle 3 to 5 more times, until the mixture has visibly reduced in volume and has taken on a slightly golden or beige color.
Goal Check: You are aiming for a consistency similar to thin syrup. Remember, the mixture will thicken substantially once it cools down.
Step 4: Cool and Chill
Once the mixture is ready:
- Remove the bowl from the microwave. Give it one last good whisk.
- Let it cool at room temperature for about 10–15 minutes.
- Transfer the mixture to an airtight container or jar.
- Refrigerate for at least 4 hours, or until completely chilled and thickened to the desired consistency.
Conclusion: A Quick Fix That Saves the Day
While the stovetop method is the classic way to get that deep caramel flavor and intense thickness, this microwave method is a total game-changer when you’re in a time crunch. It delivers a sweet, creamy substitute that works perfectly in most recipes requiring condensed milk, such as quick chocolate fudge, no-bake bars, or sweet coffee drinks.
Keep this kitchen hack in your back pocket. It just might save your next dessert!
FAQ
1. Can I use skim milk or low-fat milk?
You can, but whole milk is highly recommended. The higher fat content in whole milk is what gives store-bought condensed milk its signature richness and helps the final product thicken properly as it cools. Low-fat milk may result in a thinner, less satisfying product.
2. Why does the recipe use reduced power (50-60%)?
Using reduced power prevents the milk from boiling over the edges of your bowl, which is a common problem with dairy in the microwave. It allows the water to evaporate more gently, resulting in a smoother texture and less risk of burning the sugar at the bottom of the bowl.
3. How long will this homemade condensed milk last?
Because this version isn’t processed and sealed like canned condensed milk, it won’t last as long. When stored in an airtight container in the refrigerator, it’s best to use it within 5 to 7 days.
4. Why does it still look thin when I take it out of the microwave?
That’s normal! The mixture needs to be fully chilled in the refrigerator before it achieves its final, thick consistency. The process of condensing milk involves reducing the liquid and allowing the sugar to fully dissolve; the thickening happens primarily during the cooling period.
5. Can I double or triple the recipe?
It’s not recommended to double this recipe in the microwave. The larger volume will take significantly longer to heat and condense, increasing the risk of boil-overs and uneven heating. If you need a larger batch, it’s better to make multiple single batches or use the traditional stovetop method.