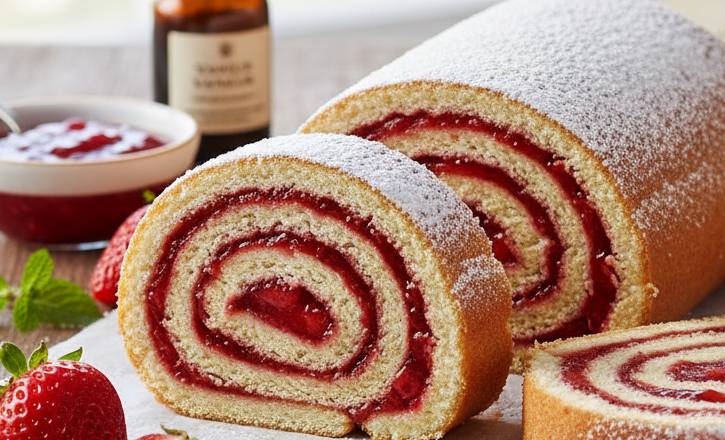
While you may be familiar with the classic Swiss Roll or Jelly Roll, Brazil offers a much more elegant and intricate version: the Bolo de Rolo (literally “Roll Cake”). Hailing from the state of Pernambuco, this dessert is famous for its unbelievably thin layers of sponge cake rolled around a sweet filling, traditionally made from melted guava paste.
Today, we’re giving this Brazilian masterpiece a fresh, vibrant, and Americanized twist by using a bright, slightly tangy Strawberry Filling. The result is a stunning dessert that is as delicious to eat as it is impressive to look at. Get ready to roll up your sleeves and create this mesmerizing, thin-layered cake that will make any occasion special.
The Recipe: Strawberry Bolo de Rolo
This recipe requires attention to detail, especially in creating the paper-thin cake layers, but the effort is worth the breathtaking presentation.
Ingredients (What You’ll Need):
For the Cake Batter:
- 1 cup (225g) unsalted butter, softened
- 1 cup (200g) granulated sugar
- 6 large egg yolks, room temperature
- 2 cups (240g) all-purpose flour
- 6 large egg whites, beaten to stiff peaks
For Topping:
Confectioner’s sugar (Powdered sugar), for dusting
Instructions (The Steps):
Part 1: Prepare the Strawberry Filling
- Cook the Jam Base: In a medium saucepan, combine the chopped strawberries, 1/2 cup of sugar, and lemon juice. Cook over medium heat, stirring occasionally, until the strawberries break down and the mixture is simmering (about 10 minutes).
- Thicken: Stir the cornstarch slurry and pour it into the simmering mixture. Cook for another 1–2 minutes, stirring constantly, until the filling thickens into a jam consistency.
- Cool: Remove from heat and transfer the jam to a bowl. Let it cool completely to room temperature. The filling must be cool before spreading.
Part 2: Bake the Cake Layers
- Preheat & Prep: Preheat your oven to 350°F (175 derajat celcius). Line a 15 x 10-inch jelly roll pan (or two smaller ones) with parchment paper. Lightly grease the paper.
- Cream the Base: In a stand mixer, beat the softened butter and 1 cup of sugar until the mixture is very light and creamy (about 3–5 minutes).
- Add Yolks: Add the egg yolks one by one, beating well after each addition until fully incorporated.
- Fold in Flour: Gradually add the flour, mixing on low speed until just combined. Do not overmix.
- Fold in Whites: In a separate bowl, whip the egg whites until stiff peaks form. Using a spatula, gently fold the stiff egg whites into the butter-flour mixture in two batches. This keeps the batter light and airy.
- Bake the Thin Layers: Pour about 1/3 to 1/4 of the batter onto the prepared pan. Use an offset spatula to spread the batter into a very thin, uniform layer covering the entire pan.
- Quick Bake: Bake for only 5–8 minutes, or until the cake is lightly golden and just set. It should remain pliable.
- Repeat: While the first layer bakes, prepare a second pan, or remove the first layer (while warm) and repeat steps 6 and 7 until all batter is used (you should get 3 to 4 thin layers).
Part 3: Assemble and Roll
- Roll While Warm: As soon as a cake layer comes out of the oven, lightly dust a clean, damp kitchen towel or a sheet of wax paper with a generous amount of confectioner’s sugar.
- Invert: Immediately invert the warm cake layer onto the sugar-dusted towel/paper and carefully peel off the parchment paper.
- Spread the Filling: Spread a very thin layer of the cooled strawberry jam evenly over the entire surface of the cake.
- Initial Roll: Starting from one of the long sides, carefully and tightly roll the cake layer (like a jelly roll). This first layer sets the foundation.
- Add Next Layers: Brush the exterior of the first roll with a tiny bit more strawberry jam. Take your second baked layer, place it next to the rolled cake, and spread filling on it. Then, continue rolling the existing cake onto the new layer, ensuring the layers are seamlessly attached.
- Finish & Chill: Continue this process until all cake layers are rolled together. Dust the exterior generously with confectioner’s sugar. Wrap the finished roll tightly in plastic wrap and chill in the refrigerator for at least 2 hours.
- Serve: Slice the Bolo de Rolo into thin, decorative discs and serve.
Conclusion
The Strawberry Bolo de Rolo is a testament to the art of Brazilian baking—a beautiful convergence of simplicity in ingredients and complexity in technique. While the steps are meticulous, the result is a breathtaking dessert that shows off vibrant strawberry color in every concentric spiral. It’s a perfect centerpiece for a spring or summer gathering and an amazing upgrade from the traditional holiday roll cake. By using the fresh, tangy strawberry filling, we honor the intricate nature of the Bolo de Rolo while making it a delightful addition to the American dessert table. Enjoy the layers of labor and love!
FAQ
Q1:Why did my cake layers break when I tried to roll them?
A:Timing and Thickness: Bolo de Rolo layers must be rolled while they are still warm and they must be extremely thin. If the layers are too thick, or if you wait too long and they cool down completely, they will lose their flexibility and crack upon rolling.
Q2:Can I use store-bought strawberry jam?
A:Yes, you can! However, the jam should be smooth, high-quality, and not too chunky, as chunks can make rolling difficult and tear the thin cake layers. If your store-bought jam is chunky, process it briefly in a food processor to smooth it out.
Q3:What is the secret to getting the layers so thin?
A:Use an offset spatula to spread the batter as thinly and evenly as possible across the entire baking sheet. The goal is transparency; the cake should bake quickly and remain flexible, not puffy like a traditional sponge cake.
Q4:Can I freeze Bolo de Rolo?
A:Yes, you can. Once the cake is completely chilled and tightly wrapped in plastic wrap, you can freeze it for up to one month. Thaw it slowly in the refrigerator overnight before slicing and serving.
Q5:What kind of pan should I use?
A:A jelly roll pan (15 X 10 inches is standard in the US) is required to achieve the thinness. If you only have smaller pans, you’ll need to divide the batter and bake it in more batches to keep the layers thin.
Q6:My cake stuck to the parchment paper! What went wrong?
A:Even with parchment, the paper should be lightly greased and/or dusted with flour (or use non-stick parchment). When peeling the paper off the warm cake, do it slowly and gently while the cake is inverted onto the sugar-dusted towel.