In the hierarchy of baked goods, the crust is often overlooked, yet it is arguably the most critical component.
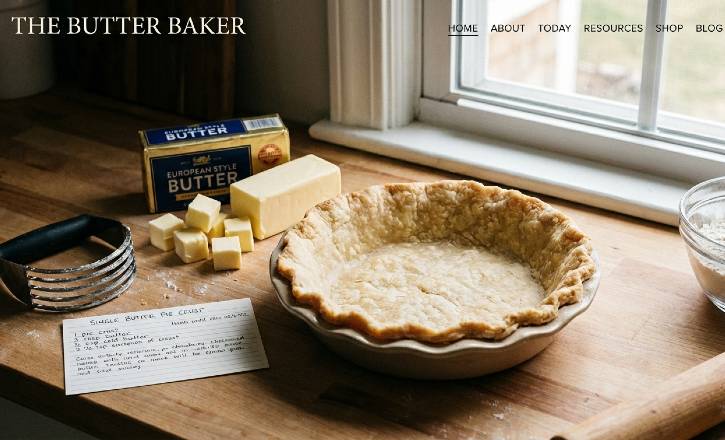
It is the vessel, the foundation of excellence, providing the textural counterpoint and the primary savory note against a sweet or rich filling. For a single pie crust, our commitment is absolute: we utilize only unsalted European-style butter.
Butter, when handled with precision, grants the incomparable richness and unparalleled flakiness that oil and shortening simply cannot replicate. This recipe is an exercise in temperature control and deliberate technique.
The Elements: Ingredients and Temperature Control
A masterful crust requires few ingredients, demanding only the highest quality and adherence to temperature mandates.
Ingredients
- All-Purpose Flour 1 1/4 cups (150g)
- Unsalted Butter 8 Tbsp (1 stick),
- Ice Water 4 to 6 Tbsp
- Fine Sea Salt 1/2 tsp
- Granulated Sugar 1 tsp
Technique: The Cold Commandment
The fundamental principle here is keeping everything cold. Warm butter melts into the flour, yielding a tough, mealy crust. Cold, discrete pieces of butter create steam during baking, which separates the layers of dough, resulting in genuine flakiness.
🔪 Method: Precision in Pastry
This process is swift and purposeful. Overworking the dough is the enemy of flakiness.
Step 1: The Dry Blend
- In a large bowl, whisk together the flour, salt, and sugar (if using).
- Alternatively, pulse the dry ingredients a few times in a food processor to ensure aeration and even distribution.
Step 2: Incorporating the Cold Butter
- Add the ice-cold, cubed butter to the dry ingredients.
- By Hand (Preferred): Work the butter into the flour using a pastry blender or your fingertips. The goal is to flatten the butter pieces into shards, ranging from the size of small peas to large beans. This process should take no more than 2−3 minutes.
- By Food Processor: Pulse the mixture 8 to 10 times until the desired butter texture is achieved. Be careful not to process the mixture into a uniform paste.
Step 3: The Hydration
- Sprinkle 4 tablespoons of ice water over the mixture. Use a fork or a spatula to gently toss the ingredients.
- Gradually add the remaining water, one tablespoon at a time, until the dough just holds together when squeezed. Do not pour the water in all at once.
- The dough should appear shaggy and somewhat dry, with many visible streaks of butter.
Step 4: The Rest (Crucial for Texture)
- Turn the dough out onto a lightly floured surface. Gather it into a disc approximately 1 inch thick.
- Wrap the disc tightly in plastic film and refrigerate for a minimum of 1 hour (up to 2 days). This allows the gluten strands, which were partially activated by the water, to relax, ensuring a tender, non-shrinking crust when baked.
Step 5: Rolling and Forming
- On a lightly floured surface, begin rolling the dough from the center outwards, rotating the disc frequently to maintain a circular shape and prevent sticking. Roll until the dough measures approximately 12 inches in diameter and is about 1/8 inch thick.
- Carefully transfer the dough to a 9-inch pie plate. Trim the edges to a 1-inch overhang, tuck and crimp them, and then return the pie shell to the refrigerator for another 30 minutes. This final chill ensures the crust holds its shape beautifully during baking.
- Chef’s Insight: If the butter softens at any point, stop and chill the dough immediately. Temperature dictates structure.
💎 Conclusion: The Pursuit of Quality
This single pie crust recipe with butter is not merely a recipe; it is a discipline. The attention paid to the quality of the butter and the swift, measured hand in the mixing process are what transform simple flour and fat into a flaky, golden-brown triumph.
Master this foundational technique, and the limitless world of fine pastry is open to you. Your finished pie—sweet or savory—will stand on the strongest possible foundation.
FAQ
Why is my crust tough instead of flaky?
This is almost always due to overworking the dough or adding too much water.
Overworking develops too much gluten, which leads to a tough texture. Remember to mix only until the dough just comes together, and utilize the resting period to relax the gluten strands.
Why did my pie crust shrink during baking?
Shrinkage occurs when the gluten hasn’t fully relaxed.
The solution is the double chill: ensure the dough rests for at least one hour after mixing, and then chill the formed, crimped crust in the pie plate for an additional 30 minutes before baking. Cold dough holds its form.
My butter melted during mixing. What should I do?
Stop immediately. If the butter melts, the opportunity for flakiness is lost. Place the dough, still in its mixing bowl, into the refrigerator or even the freezer for 10 to 15 minutes until the butter pieces are firm again. Cold butter is non-negotiable for true flakiness.
Can I use a food processor, or must I use my hands?
The food processor is acceptable for speed, but demands meticulous attention. It allows for quick incorporation, which minimizes gluten development. However, you must pulse very briefly to leave visible, distinct chunks of butter—over-processing will result in a mealy, dense crust.
What is the proper size for the butter pieces before adding water?
The ideal size is a mix: some should resemble small peas, and others should be flattened into visible, large shards or ribbons.
The tiny pieces provide tenderness, while the large shards are responsible for creating the dramatic, distinct layers of flakiness when they steam during baking.
Is it necessary to use ice water?
Absolutely. The ice water serves two critical functions: it keeps the butter cold and limits the amount of water needed to bind the dough. Less water means less gluten development, ensuring a tender final product.