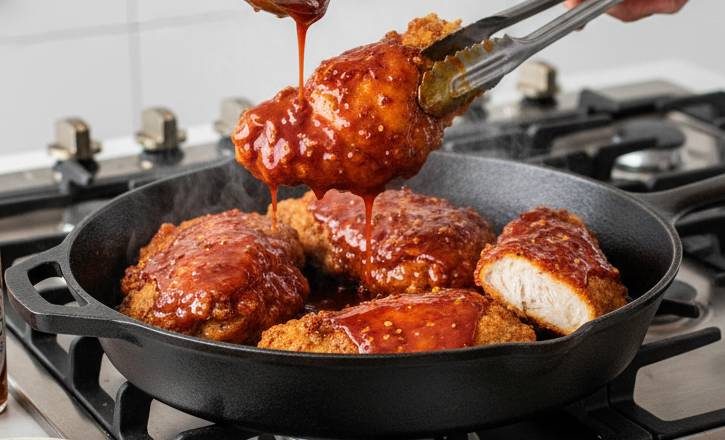
Nashville Hot Chicken is a culinary phenomenon—a delicious defiance of convention. It’s fried chicken taken to the extreme, characterized by its shatteringly crisp exterior and a fiery cayenne-laced glaze.
But here lies the challenge: achieving that signature blistering crispness while ensuring the meat beneath remains unbelievably juicy and moist. Many attempts result in a beautifully charred, spicy crust that sadly encases dry, tough meat. The problem isn’t the cayenne; it’s the technique.
The secret to answering “How to Cook Nashville Hot Chicken Juicy” lies in mastering the preparation steps before the chicken even hits the oil. We’re breaking down the science of hydration and temperature control to deliver a bird that is both scorching on the outside and soothingly tender on the inside.
The Juicy Pillars: Brine, Batter, and Thermometer
A truly delicious, juicy hot chicken relies on three non-negotiable pillars:
- The Buttermilk Brine: This acidic marinade not only tenderizes the meat but also acts as a carrier for flavor and moisture, ensuring the meat is fully hydrated before frying.
- The Double Dredge Rest: A thick, layered crust acts as an insulator, protecting the meat from the intense heat of the fryer.
- Oil Temperature Control: This is the most critical step. Frying at the wrong temperature will either leave the chicken greasy or burnt on the outside and raw/dry on the inside.
Steps: The Master Plan for Moist, Fiery Chicken
This method emphasizes the steps that guarantee internal juiciness.
What You’ll Need (Focusing on Juiciness)
- Chicken: Bone-in, skin-on Thighs and Drumsticks (Dark meat stays juicier than white meat).
- Brine: Whole Buttermilk, Hot Sauce, Salt, and a splash of Pickle Juice (The pickle juice brine tenderizes the meat further).
- Dredge: All-Purpose Flour, Cornstarch (for crispiness), and Baking Powder (for lift).
- Oil: Neutral oil with a high smoke point (Peanut, Canola, or Vegetable oil).
- Essential Tool: An Instant-Read Thermometer (for both oil and chicken).
The Game Plan (Instructions)
Step 1: The Ultimate Buttermilk Tenderizer (The Brine)
- Marinate: In a large bowl or zip-top bag, combine the buttermilk, hot sauce, salt, and pickle juice. Submerge the chicken pieces fully.
- The Wait: Refrigerate the chicken for a minimum of 4 hours, but preferably overnight (up to 24 hours). This acidic soak is the primary defense against dryness.
- Temperature Check: Before frying, remove the chicken from the fridge and let it sit at room temperature for about 30 minutes. Frying fridge-cold chicken instantly drops the oil temperature, leading to greasy, overcooked meat.
Step 2: The Insulating Crust (The Dredge)
- Dredge: Whisk together the flour, cornstarch, and dry seasonings (salt, pepper, paprika, etc.).
- Double Coat: Dredge the brined chicken (do not shake off excess buttermilk) first in the flour, then dip it back into the strained buttermilk, and finally, coat it heavily in the flour mixture one last time. Press the coating firmly onto the chicken.
- The Rest: Place the coated chicken on a wire rack for 15–20 minutes. This rest time allows the crust to hydrate and stick firmly to the chicken, creating a protective, moisture-locking shell.
Step 3: Precision Frying (The Temperature Control)
- Heat the Oil: Heat your oil in a heavy-bottomed pot or Dutch oven. Clip the thermometer to the side. The target oil temperature is 325°F (163°C), not 350°F! Lower heat cooks the meat through before the exterior burns.
- The Fry: Carefully lower the chicken pieces into the oil, ensuring you do not overcrowd the pan. Overcrowding drastically lowers the oil temperature, resulting in soggy, greasy chicken. Fry in batches.
- The Internal Check: Fry until golden brown, approximately 6–8 minutes per side (12–16 minutes total). The true sign of doneness is temperature: use the instant-read thermometer to ensure the internal temperature is 165°F (74°C).
Step 4: The Fiery Finish
- Make the Sauce: While the chicken drains on a wire rack, use some of the hot frying oil as the base for your cayenne paste. The hot oil “blooms” the spices, intensifying the flavor without making the paste cold or clumpy.
- The Glaze: Immediately and generously brush the hot spice paste onto the hot, crispy chicken.
Conclusion: Juicy Victory
The secret to truly delicious, juicy Nashville Hot Chicken is the dedicated process: starting with a generous buttermilk brine, reinforcing the crust with a long rest, and executing a controlled, lower-temperature fry.
When done correctly, you get the perfect equilibrium: a spicy, crunchy shield giving way to unbelievably tender, flavorful meat. This is a dish where patience and precision pay off, delivering heat without sacrificing a single drop of juiciness.
FAQ
Q1: Why is the recommended frying temperature 325°F (163°C) instead of the standard 350°F (175°C)?
A: For bone-in dark meat (thighs and drumsticks), a slightly lower frying temperature is critical for juiciness. A lower temperature ensures the chicken cooks completely through to the safe internal temperature of 165°F (74°C) without burning the exterior crust. Frying too hot will seal the outside quickly, but leave the inside undercooked or, conversely, overcook the meat, making it dry.
Q2: My oil temperature drops significantly when I add the chicken. Is that okay?
A: A slight drop is normal, but the temperature should not fall below 300°F (149°C). A large drop indicates one of two things:
- The oil was not hot enough to begin with.
- You overcrowded the pan. Always fry in small batches to maintain a consistent temperature. If the temperature drops too low, the chicken will absorb oil and become greasy and soggy.
Q3: I don’t have buttermilk. What can I use as a substitute for the brine?
A: The acidity of buttermilk is crucial for tenderizing. A good substitute is milk mixed with vinegar or lemon juice:
- Measure 1 cup of milk (whole or 2%). Remove 1 tablespoon of milk and replace it with 1 tablespoon of white vinegar or lemon juice. Let it sit for 5–10 minutes until it curdles and thickens slightly. Use this mixture for the brine.
Q4: Why do I need to let the coated chicken “rest” before frying?
A: The 15–20 minute rest is vital for the crust. It allows the moisture from the buttermilk to hydrate the outer flour coating, forming a starchy “glue.” This “glue” ensures the crust adheres firmly to the chicken during frying, preventing it from flaking off and acting as the protective seal that locks in the moisture.
Q5: Can I use chicken breasts (white meat) for this recipe?
A: Yes, but be extra careful with the temperature! White meat is leaner and dries out faster.
- Tip: Pound the chicken breasts to an even thickness (about 1 inch) to ensure uniform cooking. Reduce the frying time, checking the internal temperature frequently.