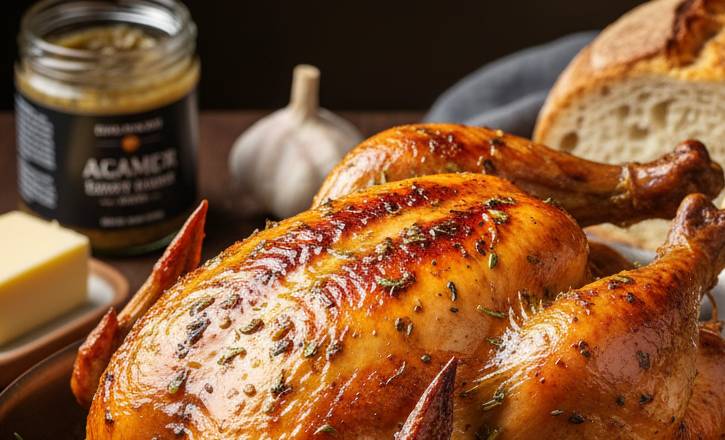
When it comes to comfort food, few things are as satisfying as a classic roast chicken. But if your usual salt-and-pepper routine is leaving you wanting more, it’s time for an upgrade. The secret ingredient? Anchovy Butter.
Don’t be scared of the fish! Anchovy fillets, when mashed into butter and roasted, completely dissolve, leaving behind an incredibly deep, rich, and savory flavor known as umami. The result is a gorgeous, crispy-skinned bird with moist, juicy meat, seasoned to perfection. This is more than just dinner—it’s a showstopper.
Here is your detailed guide on how to make anchovy butter roast chicken for a perfectly cooked, intensely flavorful meal.
What You’ll Need (Ingredients)
- 1 Whole Chicken (about 3.5–4 lbs)
- 4 Tbsp (1/2 stick) unsalted butter, softened to room temperature
- 8–10 anchovy fillets in oil, drained and finely chopped (or 1 tsp anchovy paste)
- 3 cloves garlic, finely minced or grated
- 1 tsp fresh thyme or rosemary leaves, chopped (optional)
- 1/2 lemon, halved
- 1 small onion or a few shallots, quartered
- Kosher salt and freshly ground black pepper
Step-by-Step Instructions
Step 1: Prep the Chicken and Make the Anchovy Butter
- Pat it Dry: This is crucial for crispy skin. Take the chicken out of its packaging, remove any giblets from the cavity, and use paper towels to thoroughly pat the chicken skin completely dry—inside and out.
- Make the Butter: In a small bowl, combine the softened butter, chopped anchovies (or paste), minced garlic, and chopped herbs (if using). Use a fork to mash the ingredients together until they are fully incorporated into a savory compound butter.
- Seasoning: Season the butter with a small pinch of black pepper. Note: Go easy on the salt, as the anchovies are already quite salty.
Step 2: Apply the Anchovy Butter
- Under the Skin (The Key): Carefully use your fingers to loosen the skin over the chicken breasts and thighs, creating pockets. This is where the magic happens.
- Rub In: Take about two-thirds of the anchovy butter and push it deep into those pockets, directly onto the meat. Gently massage the skin from the outside to spread the butter into an even layer.
- Exterior Rub: Use the remaining butter to rub generously all over the outside of the chicken skin. This helps achieve that beautiful, dark caramelization.
- Stuff the Cavity: Place the lemon halves and the quartered onion/shallots inside the chicken cavity. This adds aromatics and moisture.
- Final Seasoning: Sprinkle the entire exterior of the chicken with a generous amount of kosher salt and fresh pepper.
Step 3: High-Heat Roasting
- Preheat and Place: Preheat your oven to 425°F (220°C). Place the chicken breast-side up on a rimmed baking sheet or in a large cast-iron skillet.
- The Initial Blast: Roast the chicken at 425°F (220°C) for 20 minutes. This high temperature quickly renders the fat, crisps the skin, and sets the beautiful golden color.
- Reduce Heat: After 20 minutes, reduce the oven temperature to 375°F (190°C) without opening the oven door (if possible).
- Finish Cooking: Continue roasting for an additional 45–60 minutes. The total cook time is usually around 1 hour 5 minutes to 1 hour 20 minutes, depending on the size of your bird.
Step 4: Check for Doneness and Rest
- Check Temperature: The chicken is done when the internal temperature, measured with a meat thermometer inserted into the thickest part of the thigh (avoiding the bone), reads 165°F (74°C).
- The Resting Rule: Transfer the chicken to a clean cutting board and let it rest for a crucial 15–20 minutes. Do not skip this step! Resting allows the juices, which were driven toward the center during cooking, to redistribute throughout the meat, guaranteeing a juicy, tender result.
- Serve: Carve the chicken and serve it immediately, drizzling the meat with any juices collected from the cutting board and the caramelized drippings from the roasting pan.
Conclusion
Mastering the perfect roast chicken is a kitchen milestone, and with the simple addition of anchovy butter, you’ve elevated a classic to gourmet status. The umami-rich butter ensures a depth of flavor that penetrates every bite, while the technique guarantees a chicken that is “perfectly cooked”—crispy-skinned and unbelievably tender. Enjoy this showstopping meal, and prepare to be asked for the recipe!
FAQ
Q: Do the anchovies leave a fishy taste?
A: Absolutely not. When cooked under high heat, the anchovies melt completely into the butter and fat, transforming their pungent flavor into a deep, salty, umami note. They act as a silent flavor enhancer, much like a bouillon cube or mushroom powder.
Q: What’s the best way to get super crispy skin?
A: Three non-negotiable rules for crispy skin:
- Pat it dry: Make sure the skin is completely dry before adding the butter. Moisture is the enemy of crispiness.
- Rub butter under the skin: This bastes the meat from the inside and pushes the skin away, helping it crisp up.
- Start at high heat: The initial 20 minutes at 425∘F (220°C) is essential for rendering the fat and setting the crispy crust.
Q: Can I prepare the chicken ahead of time?
A: Yes, for convenience! You can make the anchovy butter and rub it all over the chicken, then place the seasoned bird (uncovered) in the refrigerator overnight. This dry-brines the chicken and helps the skin dry out even more, resulting in superior crispiness.
Q: What can I do with the pan drippings?
A: Don’t waste that flavor! The drippings—a mixture of chicken fat, anchovy butter, and juices—make a fantastic base for a quick pan gravy or can simply be drizzled over the carved meat, rice, or roasted vegetables.
Q: Why is resting the chicken so important?
A: Resting allows the muscle fibers, which contract and tighten during cooking, to relax. As they relax, the internal juices are reabsorbed into the meat. If you carve immediately, all the moisture will pour out, leaving you with dry chicken. Always rest for 15–20 minutes for maximum juiciness.